How to Draw
How to Draw the Human Body: Proportions for Beginners
Learn human body proportions for drawing: head-count guides, landmarks, torso, arms and legs, differences by build and age, and how to simplify the figure into blocks.
Key takeaways
- ◆Use head-count proportions, such as a figure about seven to eight heads tall, as a labelled guide and measure real references against it.
- ◆Landmarks such as the shoulders, nipples line, navel, hips and crotch help you check where everything sits, and they shift with pose and build.
- ◆Simplify the body into a few blocks (head, ribcage, pelvis, limbs) before adding muscle or clothing.
- ◆Proportions differ by age, build and sex, and children and adults are not the same figure at different sizes.
- ◆Shadow and ground make a pose feel grounded and moving, so add them early instead of leaving the figure floating.
To draw the human body in proportion, use the head as your unit of measure: an adult is commonly about seven to eight heads tall. Mark equal divisions down the page, place landmarks such as the shoulders, navel, crotch and knees against them, then block in the head, ribcage, pelvis and limbs as simple forms before adding any detail.
Proportion is where figure drawing is won or lost. Well-placed simple shapes look convincing, and beautifully rendered shapes in the wrong place do not. This lesson gives head-count guides (clearly labelled as guides, not laws), the key landmarks, the torso and limbs, the differences by build and age, a block-based method, and practice exercises. It works in graphite and coloured pencil (colored pencil in the US).
What you need
- Graphite pencils: an HB or 2B for construction and a 4B for tone. Graphite pencil grades explained helps you choose.
- A kneaded eraser, since you will adjust and redraw a lot at the construction stage.
- Plenty of inexpensive paper. Figure drawing rewards volume, and a sketchbook for drawing is better than a precious sheet.
- References: photos with a clear full body, simple lighting and minimal clothing folds, or a live model if you have access.
- A ruler or pencil for measuring, held at arm’s length, and optionally the grid drawing tool to transfer proportions accurately from a photo.
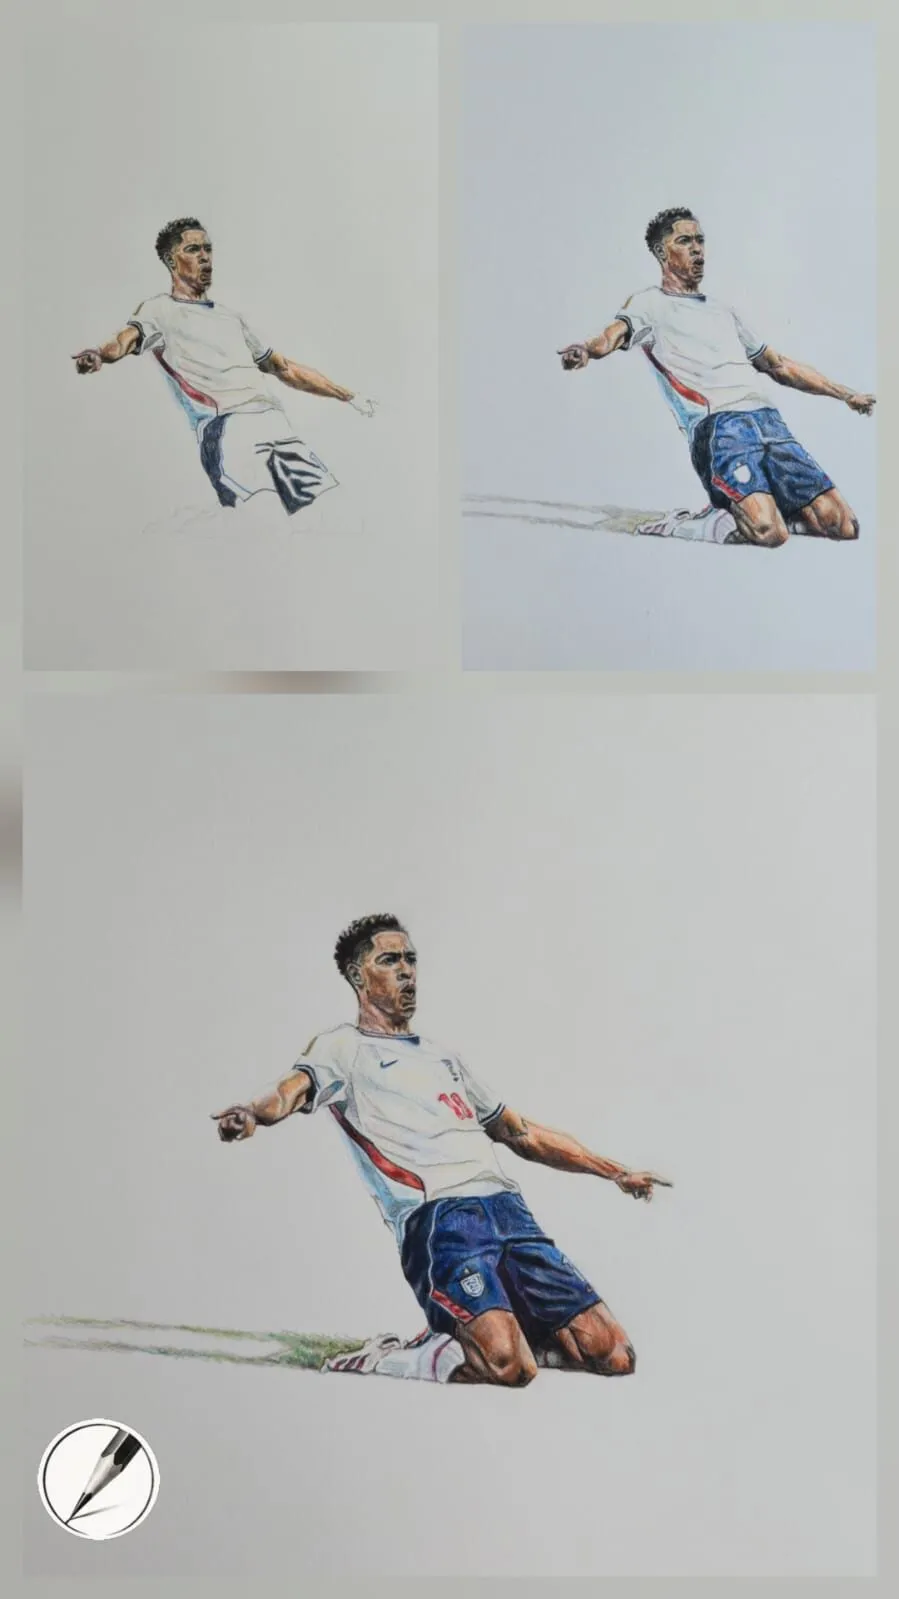
A kneeling footballer drawn in coloured pencil, shown in three stages. Drawing by Michael Brace.
The head-count guide
Artists use the head as a unit, because every body has one and it is easy to compare against. A standard adult guide looks like this.
- Total height: about seven to eight heads. Seven and a half is a common realistic approach, and eight is often used for an idealized or heroic figure.
- Chin: end of the first head.
- Nipple line: roughly at the end of the second head.
- Navel or waist: roughly at the end of the third head.
- Crotch: roughly halfway down the whole body, at about the fourth head in a seven-and-a-half-head figure.
- Mid-thigh: near the fifth head.
- Knees: near the end of the fifth head or the start of the sixth.
- Feet: at the end of the seventh or eighth head.
These are guides. People vary in leg length, torso length and overall height, and any of these points can move up or down. The value of the guide is that it gives you a consistent frame to check against, and the habit of asking, “How many heads is this?” will quickly reveal errors.
Landmarks that keep you honest
Landmarks are points on the body that are easy to spot and useful for comparison. They also help you place things accurately when the pose is complex.
- Shoulders: in a front view, an adult male is often about two to three head-widths across the shoulders, and an adult female slightly less. Treat this as a guide and measure your reference.
- Collarbones and pit of the neck: the pit sits just below the chin, between the collarbones.
- Ribcage and pelvis: two main blocks, connected by a flexible spine. The ribcage is egg-shaped, and the pelvis is a bowl-shaped block.
- Elbows and waist: in a standing pose with the arms down, the elbows often line up near the waist, and the wrists near the crotch, but variations are wide.
- Fingertips: often reach mid-thigh when the arms hang down.
- Knees and ankles: the knee sits roughly halfway between the hip and the foot, and the ankle is far narrower than the calf.
- Hands and face: as a rough guide, the hand is about the size of the face from chin to hairline. See how to draw hands for detail.
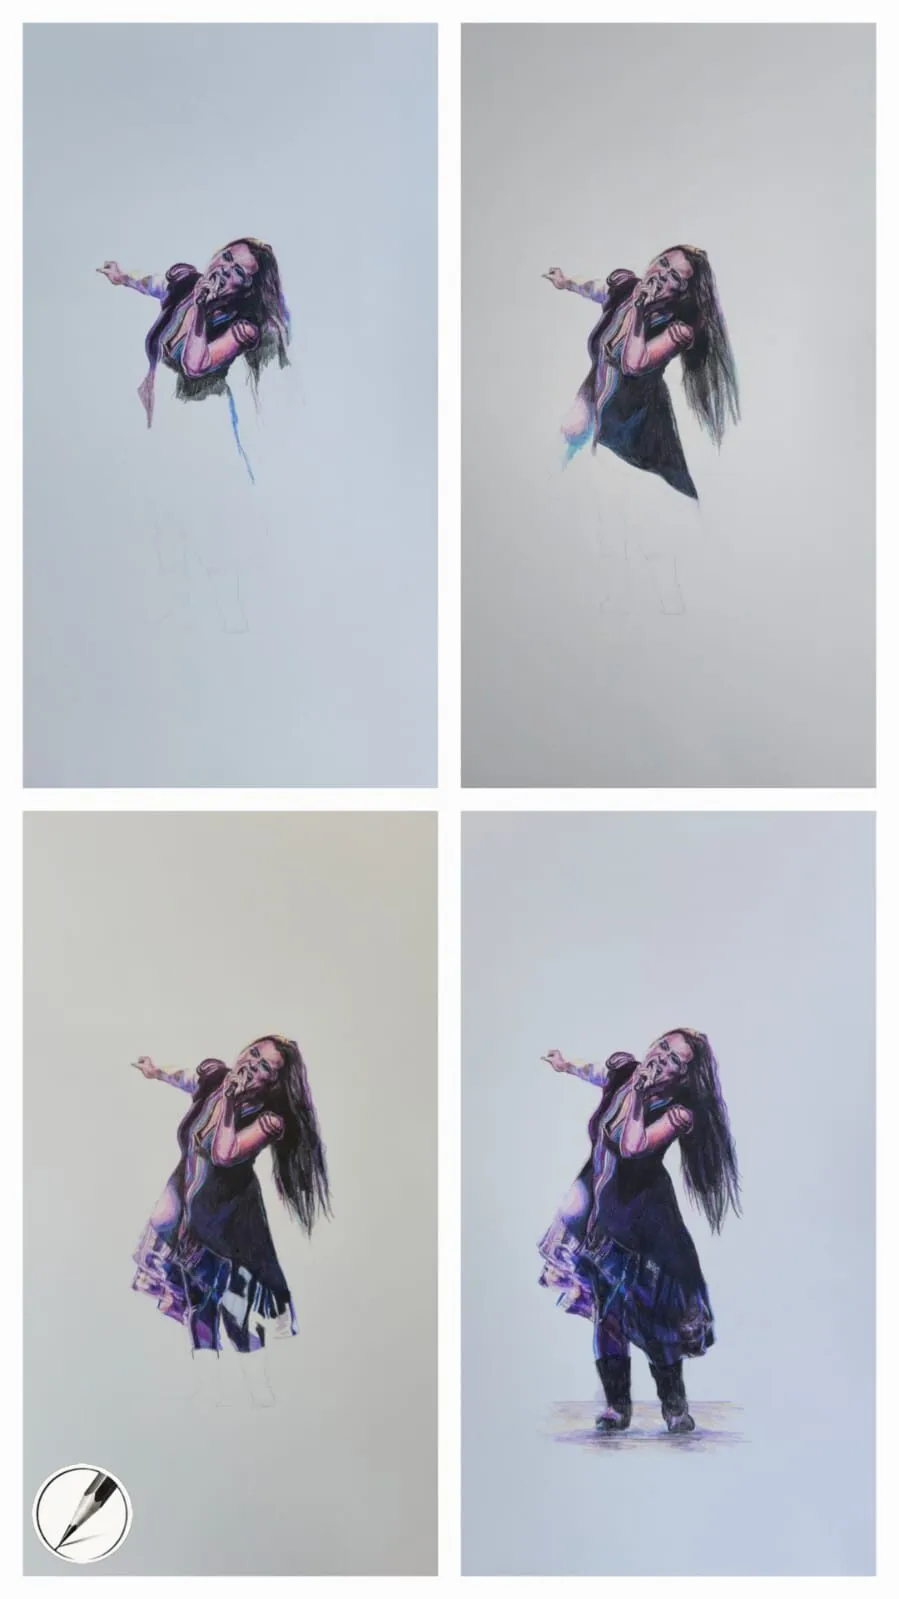
A figure drawing built up in four stages of coloured pencil. Drawing by Michael Brace.
Simplifying the body into blocks
Seeing the figure as a few big forms is the method that makes proportion manageable.
- Head: an egg or ball with a jaw, as explained in how to draw a face: proportions.
- Neck: a cylinder connecting the head to the ribcage, and set slightly forward of the spine.
- Ribcage: an egg-shaped block, tilting as the body leans.
- Pelvis: a smaller block or bowl. The tilt of the pelvis against the ribcage creates the action of the pose.
- Limbs: cylinders or tapered forms, joined at the shoulders, elbows, hips and knees with small spheres.
- Hands and feet: simple wedges and mittens at first.
Think of the body as a chain of blocks connected by joints. When the ribcage tips one way, the pelvis usually tips the other, and this counterbalance is what makes a standing pose feel natural. The basic forms and shading lesson explains how to shade these solids.
Step-by-step: drawing a figure in proportion
- Choose a clear pose and a reference. For a first attempt, a standing pose or simple action is best. Take a moment to see the direction of the whole pose, from head to feet.
- Draw the line of action. With a light curved line, mark the flow of the pose from head through the spine to the weight-bearing foot. This line keeps the figure from becoming stiff.
- Mark the head-count. Measure the head in your reference and mark equal divisions down the figure. Note where the chin, nipples, navel, crotch and knees fall, and compare them with the guide above. Adjust for the actual person.
- Block in the head, ribcage and pelvis. Draw the ribcage and pelvis as simple shapes, tilted as in the pose, and connect them with the spine. Check their sizes against the head.
- Add the limbs. Draw the arms and legs as tapered cylinders, marking the shoulders, elbows, wrists, hips, knees and ankles. Check lengths against each other, and against the head-count.
- Check the landmarks. Compare the horizontal and vertical relationships. Do the shoulders line up with the hips as in the reference? Is the weight-bearing foot directly under the body’s center of gravity? Correct errors now while the forms are still simple.
- Refine the shapes. Turn the blocks into more natural forms by adding the curve of the shoulders, the taper of the waist, the bulk of the thigh and calf, and the shape of the hands and feet. Keep the lines soft and overlapping.
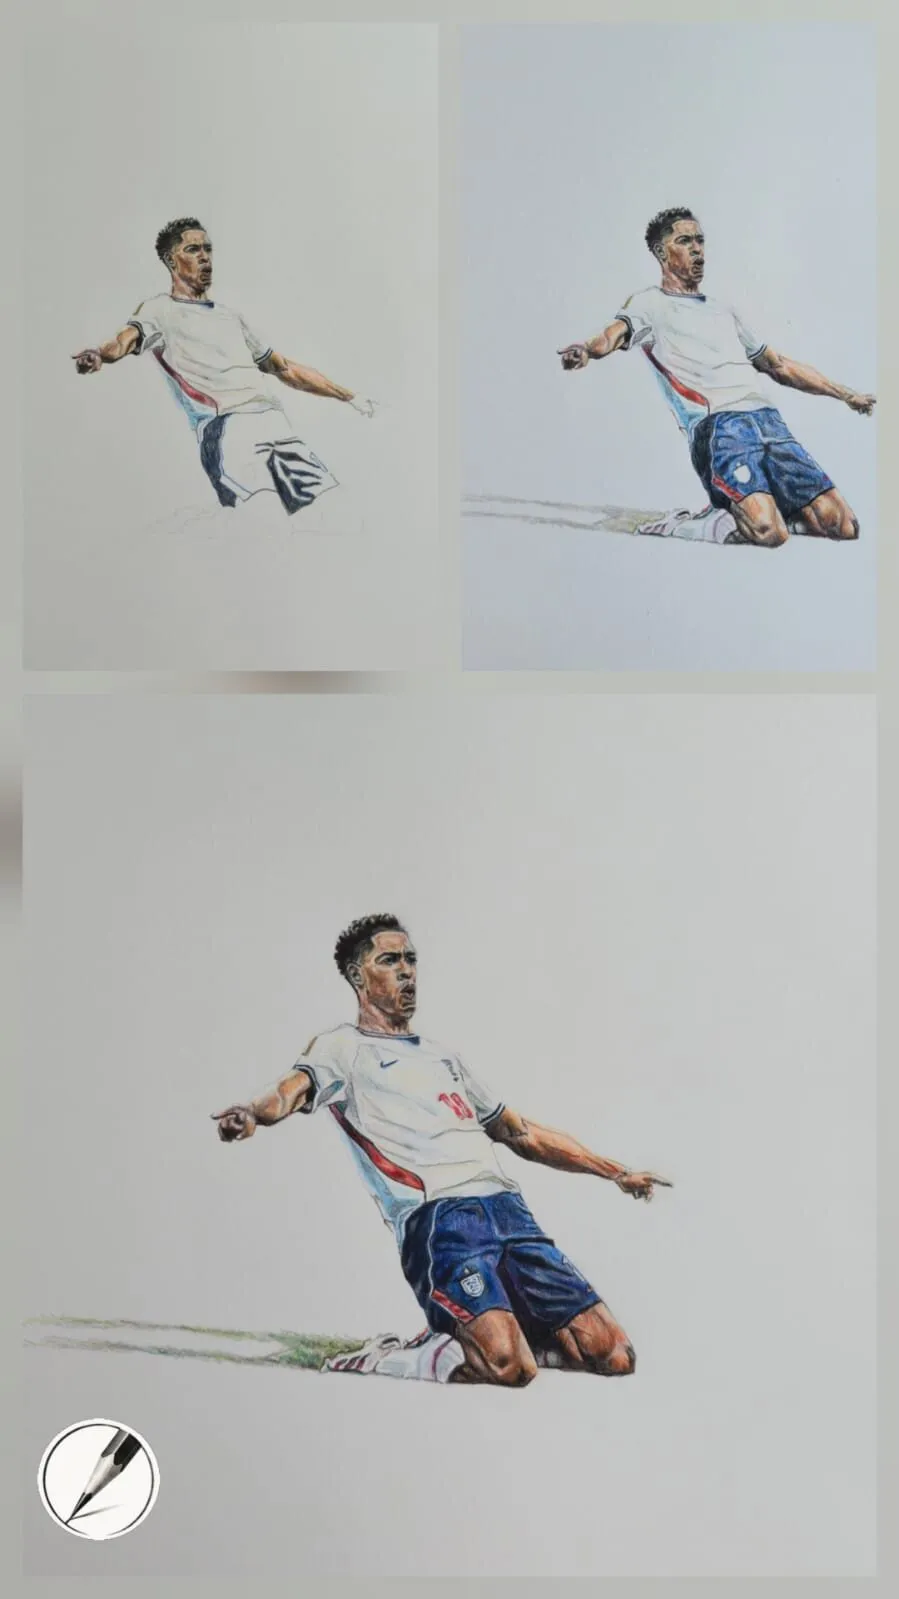
- Add the ground and shadow. Draw a ground line, then a cast shadow beneath the figure in the same direction as your light. Shadow and ground anchor the pose and give it weight, as in the hero image.
- Shade the main forms. Apply simple tone to the shadow side of each form: the side of the ribcage, the underside of the chin, the inside of the limbs. Keep the shadows as shapes and avoid drawing every muscle.
- Adjust and finish. Step back, compare proportions again, and fix any remaining errors. If you are adding colour, keep the same value structure and build colours in thin layers.
Differences by build and age
A single formula cannot describe all people, and good figure drawing starts with seeing the individual.
- Children: the head is larger relative to the body. A toddler might be only about four heads tall, a child of around ten closer to six, and a teenager approaches adult proportions. Limbs are shorter and softer, and features sit lower on the head.
- Adults: the seven to eight head guide applies, with the crotch around halfway down.
- Older adults: posture often changes, with a slightly curved spine, lower shoulders and sometimes a shorter overall height. Soft tissue and muscle mass shift too. See how to draw wrinkles and older faces for the head and face.
- Build: a slim person may have narrow shoulders, long limbs and small masses. A heavier or muscular build has broader blocks, thicker limbs and rounded forms. Keep the same landmarks, and change the sizes of the blocks.
- Sex: on average, men tend to have broader shoulders in relation to the pelvis, and women often have a relatively wider pelvis and narrower shoulders, but individuals vary widely. Treat this as a tendency and follow your reference.
Foreshortening and overlap
When a limb points toward you, the usual proportions shrink. A foreshortened arm appears short and wide, and you see more of the hand than the forearm. Do not resort to the head-count here. Instead, measure by comparing overlapping shapes and use the tilt of the blocks. Overlap is the strongest cue for depth, so let the nearer forms overlap the further ones and add a touch of darker tone where they meet.
Adding tone and colour
Once the proportions are right, tone makes the figure solid. Use a single light direction and keep the tones simple: a light side, a shadow side and a cast shadow. The shadows and light lesson covers the method, and the value study tool helps you simplify a reference into a few tones.
In coloured pencil, start with thin layers of local colour, deepen the shadows with cooler or browner tones instead of black, and let the ground colour influence the figure through reflected light. Michael’s dynamic-pose example shows how a simple ground with a cast shadow can give a figure both weight and movement.
Common mistakes and how to fix them
- A tiny head or giant head. Fix: measure the head against the whole figure and check the head-count.
- Legs too short. Fix: remember that the crotch sits roughly halfway down the body, and that the legs make up about half the height.
- Stiff, straight posture. Fix: start with a line of action and tilt the ribcage and pelvis in opposite directions.
- Jumping to details. Fix: stay with the blocks until the proportions are right.
- Arms and legs the same width throughout. Fix: taper the limbs and mark the joints as narrower places.
- A floating figure. Fix: add a ground plane and a cast shadow early.
- Copying only the outline. Fix: think in forms and volumes, and draw through the shapes so you understand how they overlap.
Practice exercises
- Head-count chart. Draw a row of eight equal boxes, then place a simple figure inside it, marking each landmark.
- Thirty-second gestures. Draw thirty figures in thirty seconds each, using only the line of action and the blocks.
- Block figures. Draw five figures from photos using just the ribcage, pelvis and limb cylinders.
- Proportion comparison. Draw the same pose as a child, an adult and an older adult, noting how the head-count changes.
- Shadow and ground. Take one of your blocked figures and add a ground plane and cast shadow, noticing how the pose changes.
- Overlap study. Draw a limb pointing toward you, using overlapping shapes to show the depth.
Next steps
For a structured reading list, see best books for figure drawing. Next, practise how to draw hands, the feature that most often undermines a good figure, and review how to draw shadows and light. For making your practice a habit, try how to practise drawing daily, and browse the how to draw pillar.
The short version
Use the head as a unit, with an adult about seven to eight heads tall as a labelled guide. Check landmarks, block the body into head, ribcage, pelvis and limbs, and compare proportions with your reference before refining. Allow for age and build, and finish with a ground plane and cast shadow so the figure feels grounded and alive.
Quick answers
Frequently asked questions
How many heads tall is the human body?+
A common guide for an adult is about seven to eight heads tall, with seven and a half often used for a realistic figure and eight for an idealized one. Real people vary, so use it as a starting point. Children are fewer heads tall, and their heads are larger compared with their bodies.
How do you draw a body in proportion?+
Measure everything against the head. Mark equal head-height divisions down the page, place landmarks like the chin, nipples, navel, crotch and knees at the guide points, then block in the ribcage, pelvis and limbs. Compare your drawing with the reference and adjust, treating the head-count as a guide rather than a law.
What is the easiest way to draw a human figure?+
Start with a simple line for the spine and the action of the pose, then add blocks for the head, ribcage and pelvis, and sticks or cylinders for the limbs. Check the proportions, refine the shapes into forms, and only then add muscle, clothing and shading. Working from big to small is the key habit.
Do men and women have different proportions?+
On average, men have broader shoulders relative to their hips, and women often have a slightly wider pelvis relative to the shoulders, with differences in fat distribution. These are averages, and build, age and genetics vary widely. Draw the person in front of you or in your reference, using these ideas as guides.