Drawing Techniques
How to Prevent and Remove Wax Bloom in Coloured Pencil
Wax bloom is the waxy haze that can appear on coloured pencil (colored pencil) drawings. Learn what causes it, how to prevent it and how to treat it gently.

Key takeaways
- ◆Wax bloom is a cloudy, whitish or hazy film that can surface on drawings made with wax-based coloured pencils, most often after heavy layering.
- ◆Prevention is easier than cure: start with light pressure, build many thin layers and save heavy pressure for the end.
- ◆Firmer, oil-based pencils are less likely to bloom than soft wax pencils, which makes them a sensible choice for dense, heavily layered work.
- ◆A gentle wipe with a soft, clean cloth or tissue often removes surface bloom, but the haze can return and heavy rubbing can smudge or burnish your work.
- ◆Fixative and framing choices affect how bloom behaves; test on a scrap first and check the maker's guidance.
Wax bloom is one of those problems that can appear days or weeks after you finish a drawing. A rich, dark area turns cloudy, as if someone had breathed on the surface, and the colour you were proud of looks dull. It is frustrating, but it is manageable once you understand what it is and how your habits contribute to it.
This guide explains what wax bloom is, what causes it, how to prevent it while you draw, how to treat it if it appears and what to think about when framing. It is part of our coloured pencil techniques cluster. Coloured pencils, called colored pencils in the US, are the subject throughout, and the advice stays general: pencil formulas differ, so always test on your own materials.
What wax bloom is
Many coloured pencils use a wax binder to hold pigment. Wax bloom is a hazy, whitish or cloudy film that can appear on the surface of a drawing when that wax rises out of heavy layers. It is most visible over dark or saturated colours, where it shows as a pale, slightly greasy or powdery veil.
It is cosmetic rather than a sign that the drawing has failed, but it changes how colour reads, dulls contrast and can look like a mistake in the drawing when it is actually a surface effect. It is also not exclusive to one brand; it is a known characteristic of wax-based pencils, particularly soft ones. Prismacolor-style soft wax pencils are well known for it on heavy layering, while firmer, oil-based ranges are less prone.

A black picture frame with a white mount in portrait format.
What causes it
The usual suspects are simple:
- Heavy layering with soft wax pencils. Dozens of layers, especially with pressure, push a lot of wax into the paper’s tooth.
- Pressing hard too early. This flattens the tooth, leaving no space for more pigment, so the extra wax sits on top.
- Saturating the same area repeatedly without a plan for values.
- Temperature changes and storage may play a part for some pencils, so keep finished work somewhere stable.
Michael’s source notes that bloom is a known risk with soft wax pencils, and that firm pencils such as Faber-Castell Polychromos layer cleanly without bloom. For the pencil differences, see wax versus oil-based coloured pencils.
How to prevent wax bloom
Prevention happens while you draw.
1. Start with light pressure
The guiding rule in Michael’s layering advice is to start with light pressure and increase intensity gradually. It keeps colours clean and lets you adjust values slowly. Think of every layer as a whisper. The how to layer coloured pencils guide covers the method.
2. Use more thin layers, not fewer heavy ones
Many thin layers give luminous, adjustable colour. A few heavy ones force wax into the tooth and close it up fast. If an area will not take more pencil, stop adding pressure; change technique instead.
3. Plan your layer order
Work light to dark and general to specific. Put your darkest, most saturated colours down gradually, and do not build the deepest dark first. Clear planning also keeps you from having to rework areas, which is another bloom trigger.
4. Choose the right pencil for heavy layering
If your style demands dense, many-layered work, firm oil-based pencils are the lower-risk option. Soft wax pencils are lovely to draw with and blend easily, but they need a lighter touch. See best coloured pencils and the Polychromos review for firm-pencil options.
5. Match paper to the pencil
Paper with good tooth, such as a heavyweight textured sheet, accepts more layers before the surface fills. See paper tooth and smooth versus textured paper and best paper for coloured pencils.
6. Burnish last, and only when you must
Burnishing presses wax into the paper to create a smooth, glossy finish. It flattens the tooth and locks pigment in, so heavy burnishing can encourage a waxy surface. Do it only when layers are complete. See how to burnish coloured pencils.
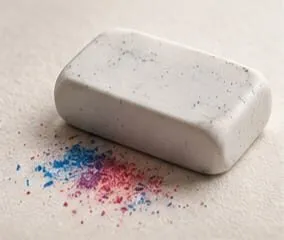
A white eraser on paper with coloured pencil dust beside it.
How to remove wax bloom
If bloom appears, the usual general approach is gentle and minimal.
- Let the drawing rest. Bloom can continue to surface for a while, so wait before treating.
- Use a clean, soft cloth or tissue. Wipe very lightly across the surface in one direction. Use no pressure beyond the weight of your hand.
- Stop and check. Look at the area in raking light. If the haze is reduced, stop; do not keep rubbing.
- Test first. Try it on a scrap drawing or an unimportant corner, because rubbing can smudge loose pigment or burnish the tooth and change the texture.
- Accept that it may return. Bloom is a surface migration of wax, so a wipe manages it rather than curing it.
If the haze is thick, persistent or over a very detailed passage, it may be better to leave the area alone and address bloom by framing choices than risk damaging the work. For drawings you plan to sell, treat bloom as a reason to discuss materials with whoever framed or bought the piece.
Fixative: use with caution
Some artists spray a finished coloured pencil drawing with fixative, either to seal the surface or to reduce smudging and bloom. There is no single rule that suits every pencil and paper.
- Fixative can change the surface, sometimes dulling or darkening colours or removing the subtle sheen you worked for.
- It can reduce your ability to add colour afterwards, since it seals tooth.
- Different fixatives behave differently, and ventilation and safety advice on the can should be followed.
Test on a scrap made with the same pencils and paper, and read the maker’s current guidance. If you plan to use solvents or mixed media, see using solvents with coloured pencils as well.
Bloom and framing
How a drawing is framed affects how it ages and how it looks.
- Protect the surface. Glazing held away from the drawing by a mount keeps the glass from touching the pencil. Our frame and mount calculator helps plan the mount, and how to frame and mount a drawing explains the basics.
- Let the drawing settle. If you suspect bloom, leave the finished piece flat and unframed for a little while before sealing it behind glass. Wiping first and then framing gives you a clean start.
- Avoid contact. Never frame with the glass touching the surface; pigment and wax can transfer.
- Store stably. Keep drawings away from heat sources and in a stable environment.
Specific framing materials and their effects vary, so check the framer’s advice for your piece.
Troubleshooting
| Problem | Likely cause | What to try |
|---|---|---|
| Hazy film on dark areas | Heavy soft wax layering | Wipe gently, then leave alone |
| Bloom returns after wiping | Wax still migrating | Wipe again lightly or accept; consider framing choice |
| Waxy, shiny surface and no more colour | Tooth filled | Stop layering; burnish or glaze lightly |
| Smudged areas after wiping | Too much rubbing pressure | Stop; retest on a scrap next time |
| Colour dull after fixative | Fixative altered surface | Test fixative first next time |
Keeping drawings stable after they are finished
Once a drawing is done, handle it by the edges and store it flat with a clean sheet of protective paper or within a mount, away from radiators, direct sun and damp. Avoid stacking drawings under weight, because pressure can transfer wax and mark the surface. If you need to transport work, keep it flat and protected, and check it before framing. These habits do not guarantee that bloom will never appear, but they remove avoidable stresses while you watch how your materials behave.
The short version
Wax bloom is a hazy film from wax rising out of heavy layers, mostly with soft wax pencils. Prevent it by layering lightly and patiently, choosing firm oil-based pencils for dense work, burnishing sparingly and planning values. If it appears, wipe gently with a soft cloth, test first, and stop early. Treat fixative with caution and frame with a mount so glass does not touch the drawing. For related technique advice, see how to layer coloured pencils and coloured pencil mistakes.
Quick answers
Frequently asked questions
What is wax bloom in coloured pencil?+
Wax bloom is a hazy, cloudy or whitish film that can appear on the surface of a drawing made with wax-based coloured pencils. It is caused by wax rising to the surface, most often after heavy layering or pressure. It can dull dark colours and make a drawing look cloudy.
How do you get rid of wax bloom?+
The common, general advice is to wipe the surface gently with a clean, soft cloth or tissue, using very light strokes. Test on a scrap or an unimportant corner first, because rubbing too hard can smudge or burnish the layers. Bloom can return, so treat it as management rather than a permanent fix.
Do oil-based coloured pencils get wax bloom?+
Less often. Firmer, oil-based pencils such as Polychromos layer without building up the greasy sheen that soft wax pencils sometimes produce, and Michael notes they can take dozens of layers without bloom. Individual pencils and conditions vary, so light pressure and testing remain good practice.
Are colored pencils and coloured pencils the same?+
Yes. Coloured pencils is the UK spelling and colored pencils is the US spelling, and they are the same pencils. Wax bloom can affect both, and everything here applies whichever name you use.
Does fixative stop wax bloom?+
Some artists use fixative to seal a finished coloured pencil drawing, but it can change the look of the surface, dull or darken colours, and it does not suit every paper or pencil. Test on a scrap, follow the fixative maker's instructions and check the current guidance for your materials.